
Managing contacts is an important part of your vacation rental business workflow. Read our Guests Overview article for a high level overview on what "guests" are and how they relate to the rest of the system.
The following instructions will cover most of the ways guests and contacts can be created in OwnerRez.
- Creating guests as you work on bookings, inquiries and quotes
- Create a new guest record (via the CRM menu)
- Create a new guest record from anywhere in OR
- Vendors
Creating guests as you work on bookings, inquiries and quotes
Most of the time, there is no need to create a standalone guest record (ie. via the Contacts area) before using it elsewhere in the system.
Typically, the guest will be automatically created while you work on inquiries, quotes, and bookings. For instance, while you manually create a quote or booking, you will be prompted to enter guest information right on the quote/booking form. The same is true when creating new inquiries. You'll see a field where you can enter the guest's name, email, or phone.
Notice that, as you type, this field will actively search in the background and show you everyone that matches the name, phone or email that you enter. This instant search is highly optimized for speed but may take a second to return results, so give it a moment if nothing happens.

Many times, an existing guest will pop up matching what you entered because you've talked to this person before or they've booked in the past. If that's the case simply select their name from the list.
You can select the matching guest by clicking on it with your mouse, or you can use the down/up arrow keys on the keyboard to set focus to it and then click the enter key.
If you don't recognize the matches and need to create a new contact, you can quickly do that by selecting the bottom + Add option at the bottom of the results list. Even if there are no matches returned, you will still see the bottom + Add option in the results list.
After you select the matching contact or the "+ Add..." option, the form will immediately display additional fields. These fields let you quickly add or update guest information without having to go elsewhere and come back. If you have selected an existing/matching guest, you can update their email, phone number, or address.
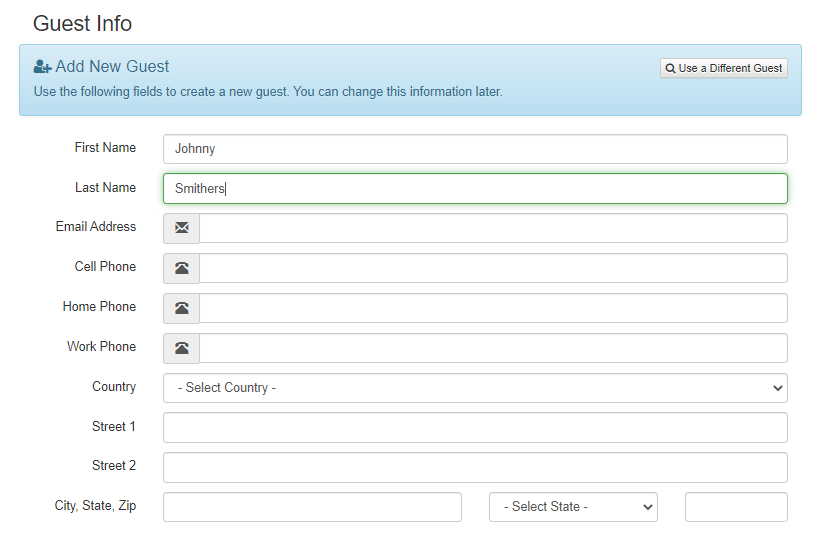
After filling in the guest info, continue down the inquiry, quote or booking form and finish the rest of the form. (Shown below is the remainder of the form for a Booking.)
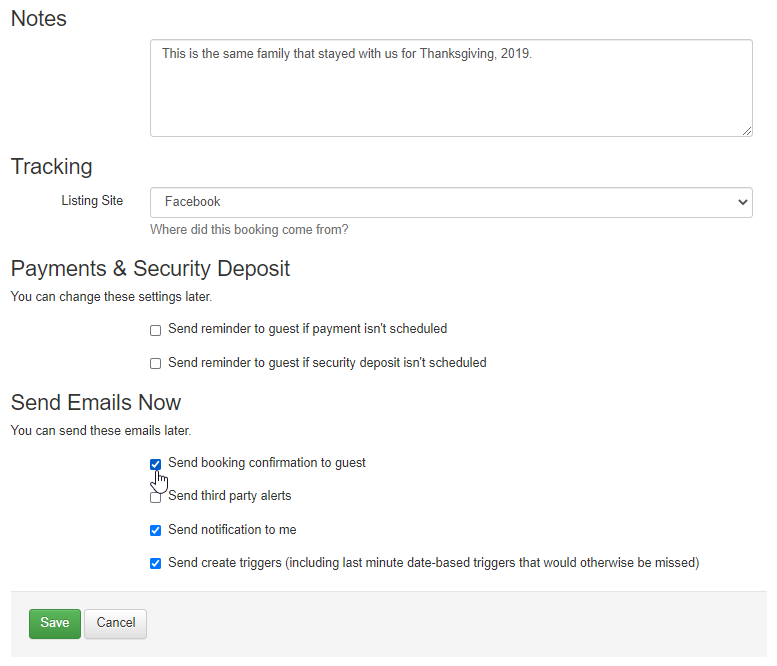
Once you click the Save button, the guest record will be created (or updated if it already existed) and saved along with the new inquiry, quote or booking. If checked during a Booking, the system will also send confirmations and email Templates which Trigger when a booking is created.
You can verify that the new guest record was created by going to the CRM > Contacts page and searching for the guest using the filters provided. If it's a new guest, it will be at the top of the list because the sort order defaults to "most recently created".
Create a new guest record (via the CRM menu)
Do you need to add a guest record or even a partial record? Select Contacts from the left navigation menu and click + Add Contact.
Enter as much information as you have about the guest, including their name. Add their email, phone number, and address by clicking on the appropriate buttons. Every field is optional. If you only know part of the name, just enter the part you know. If you only know a phone number but nothing else, just enter it. Note: If you don't have an address, use the "Remove Address" button if you receive an error message stating an address is required for US residents.
Property Management (PM) premium feature users can add a contact as an owner or vendor, but if no selection is made, the contact will default to Guest.
Once saved, you can verify the new guest record was created back on the Contacts page. It will be at the top of the list because the default sort order is "most recently created".
Create a new guest record from anywhere in OR
No matter where you are in OwnerRez, you can create a guest record without navigating anywhere else. Yep, that's right! Even in the middle of editing a calendar or reading a report, you can create a new guest without losing the info you're working on.
Let's suppose that you're busy working on something in OwnerRez, and you get a phone call from a potential guest. You don't recognize the guest's name or number and want to create a new record (or see if they were a previous guest) without leaving the page you're on. You can do that!
Under the top Tools menu, click "Find or Create Contact".
You'll see a dialog window open on top of the page you were working on. The page will not redirect or change. If you were filling out a form, the form will remain the same.
Enter the name, email or phone number of the new guest. As you type, the system will attempt to find existing matches and will show them to you (just in case they've contacted you before).
If you see a previous guest that matches, click on their name, and you'll see the guest's information displayed in the dialog window. From there, you can make a quick update to the guest's record, copy the information (such as to an email program to send the guest a message) or close the dialog window. If the person on the other end of the line is new, select "+ Add" and complete the information for your new contact. When finished, select "Create Guest & Close" to close the dialog window and continue working on the page you were on originally.
Vendors
Centralizing vendor contact information allows you to keep phone, email, and address details, ensuring records are accurate and easy to find. Vendors are a contact type, letting you search, select, and merge vendor records the same way you manage other contacts, keeping expense tracking consistent.
Add a new Vendor contact by navigating to the left Contacts menu, and clicking the + Add Contact button. Notice that we've renamed the button from 'Guest' to 'Contact' for greater flexibility.
Enter your Vendor's contact information and the Contact Type (Owner or Vendor) on the Add Contact page, and click Save.
And your new Vendor contact will appear on the Contacts grid with the blue Vendor label in the Type column.