GuestsKey is a smart lock automation platform for short-term rental property managers. It eliminates manual code management by automating the entire access key lifecycle.
Features
- Guest Keys — Automatically generated from guest phone number, scheduled to activate at check-in and deactivate at check-out
- Cleaner Keys — Scheduled access during turnover gaps between bookings
- One-Time Keys — Temporary access for vendors, maintenance, or deliveries with custom expiration
- Emergency Keys — Fallback keys auto-distributed to guests if primary key fails to set before check-in, with automatic rotation after use
- Real-Time Sync — Booking changes in OwnerRez instantly update key schedules
- Multi-Property Dashboard — Manage all properties and upcoming bookings in one place
Supported Locks
- SmartThings-connected Z-Wave locks
- Seam-supported locks (Yale, Schlage, August, Kwikset, Lockly, and more)
Steps for Integration
1. Create Your Account: Go to https://app.guestskey.com to create an account. From the home page, click the green "Start Free Trial →" button.
2. Fill Out Account Information: Provide your name, email address, a strong password, and your company or rental name. Click "Next Step" to proceed.
3. Select Your PMS: After entering your account information, select your PMS. To connect with OwnerRez, click "Connect OwnerRez".
4. You will be redirected to OwnerRez to sign in via OAuth. Enter your OwnerRez login credentials (two-factor authentication will apply if enabled). Click "Sign In".
5. Authorize GuestsKey to automatically sync your property and booking data. Click "Authorize GuestsKey" to grant access.
6. Once successfully connected, you will be redirected back to GuestsKey. Click "Continue" to sync properties and connect smart locks.
7. Connect and Map Smart Locks: Link your smart locks via SmartThings or Seam (supports Yale, Schlage, August, Kwikset, and more). Click the down arrow next to "Not Connected" to expand the connect lock options.
8. Click "Connect Seam Lock". This will redirect you to Seam to log in with your lock manufacturer credentials.
9. You will be redirected to Seam (official API provider for all major lock brands) to sign in with your lock provider account. Click the "Continue" button.
10. Select your lock brand.
11. Once selected, you'll be redirected to sign in with your lock provider. Enter your credentials and click "Sign In".
12. You'll be redirected to Seam, confirming your lock is successfully connected to GuestsKey. Click "Return to GuestsKey" to finalize your lock configuration.
13. Once redirected, validate locks are connected to the correct property.
14. If you have multiple properties and locks, scroll down to add and configure locks. If you have multiple locks from the same provider, expand the property you want to map. Verify the locks for each property before continuing. To add another lock integration, click "Connect Different Lock".
15. To add more locks, follow the same steps by clicking "Connect Different Lock". You will be redirected to Seam again. Once completed, you'll return to GuestsKey. Scroll down to review Lock Automation Mappings—this is where you configure which locks apply to each GuestsKey automation type.
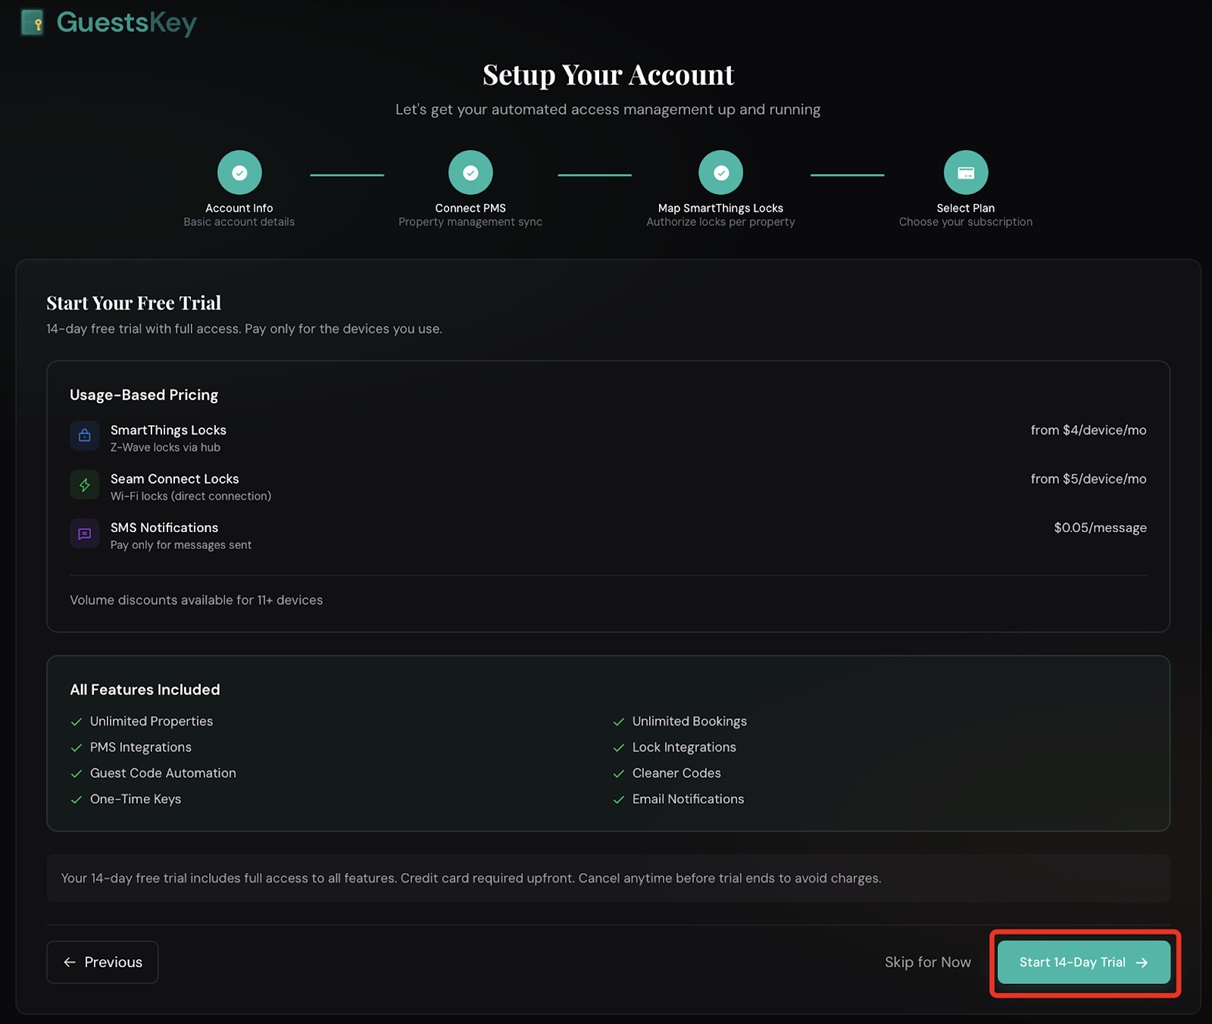
16. Expand Lock Automation Settings to configure which GuestsKey automations are enabled (you can change this later in property settings). Click "Continue with X properties" to review the usage-based billing plan.
17. Start Your Free Trial: Click "Start 14-Day Trial" to proceed to Stripe checkout. Enter your billing information, then click "Start trial".
18. GuestsKey free trial
19. Welcome to GuestsKey! Click "Go to Dashboard" to enable lock automation for your property.
20. Enable Guest Automation: Next, enable Guest Automation for each property. Once enabled, GuestsKey will automatically generate and schedule access codes for all future bookings. Before configuring, clear any previously set guest codes from your locks. Click the property you want to configure.
21. Toggle the switch to enable automation and click "Save Guest Settings". Refresh your browser to see active and scheduled codes.
22. Setup Complete! GuestsKey automation setup is complete! Your access codes will now be automatically managed based on your OwnerRez bookings.
What Data is Transmitted
Properties
- Property name
- Address (used for timezone detection)
- Bedrooms, bathrooms, max guests
Bookings
- Guest name and phone number
- Check-in and check-out dates/times
- Booking status (confirmed, cancelled)
- Booking channel (Airbnb, Vrbo, direct, etc.)
Webhooks
GuestsKey receives real-time webhook notifications for:
- New bookings → Code generated and scheduled
- Booking updates → Code timing adjusted if dates change
- Cancellations → Scheduled codes removed
Note: GuestsKey is read-only. We do not write any data back to OwnerRez.
Deactivate
Users can deactivate their GuestsKey lock integration by following the instructions in the Deactivate Door Lock Integration section of the Door Locks Overview support article.