If you use Namecheap.com to host your website with your domain name, you more than likely have your own email address associated with that domain (you@yoursite.com). If this is the case, you will want get our domain "Verified". Why verify your domain? The primary reason for OwnerRez users is so that your email address will also be verified. Once your domain has been verified, any emails associated with are automatically verified.
If you own your own domain, say acmevacations.com, you can set DNS records that verify us as a sending server. Once you do that, we'll switch over to sending directly FROM your verified email address -- say bookings@acmevacations.com. Of course your domain will be different, and you can pick any prefix, like your name.
Starting the process:
Go to Settings > Branding & Legal > Verified Email Domains.
On that page, click the "Verify Domain" button. On the Verify Domain page, enter your website name in the Domain Name field. Make sure there are no spaces at the beginning or end. Also, make sure you don't include any http, www, or other characters.
Then click the green "Save and View Instructions" button.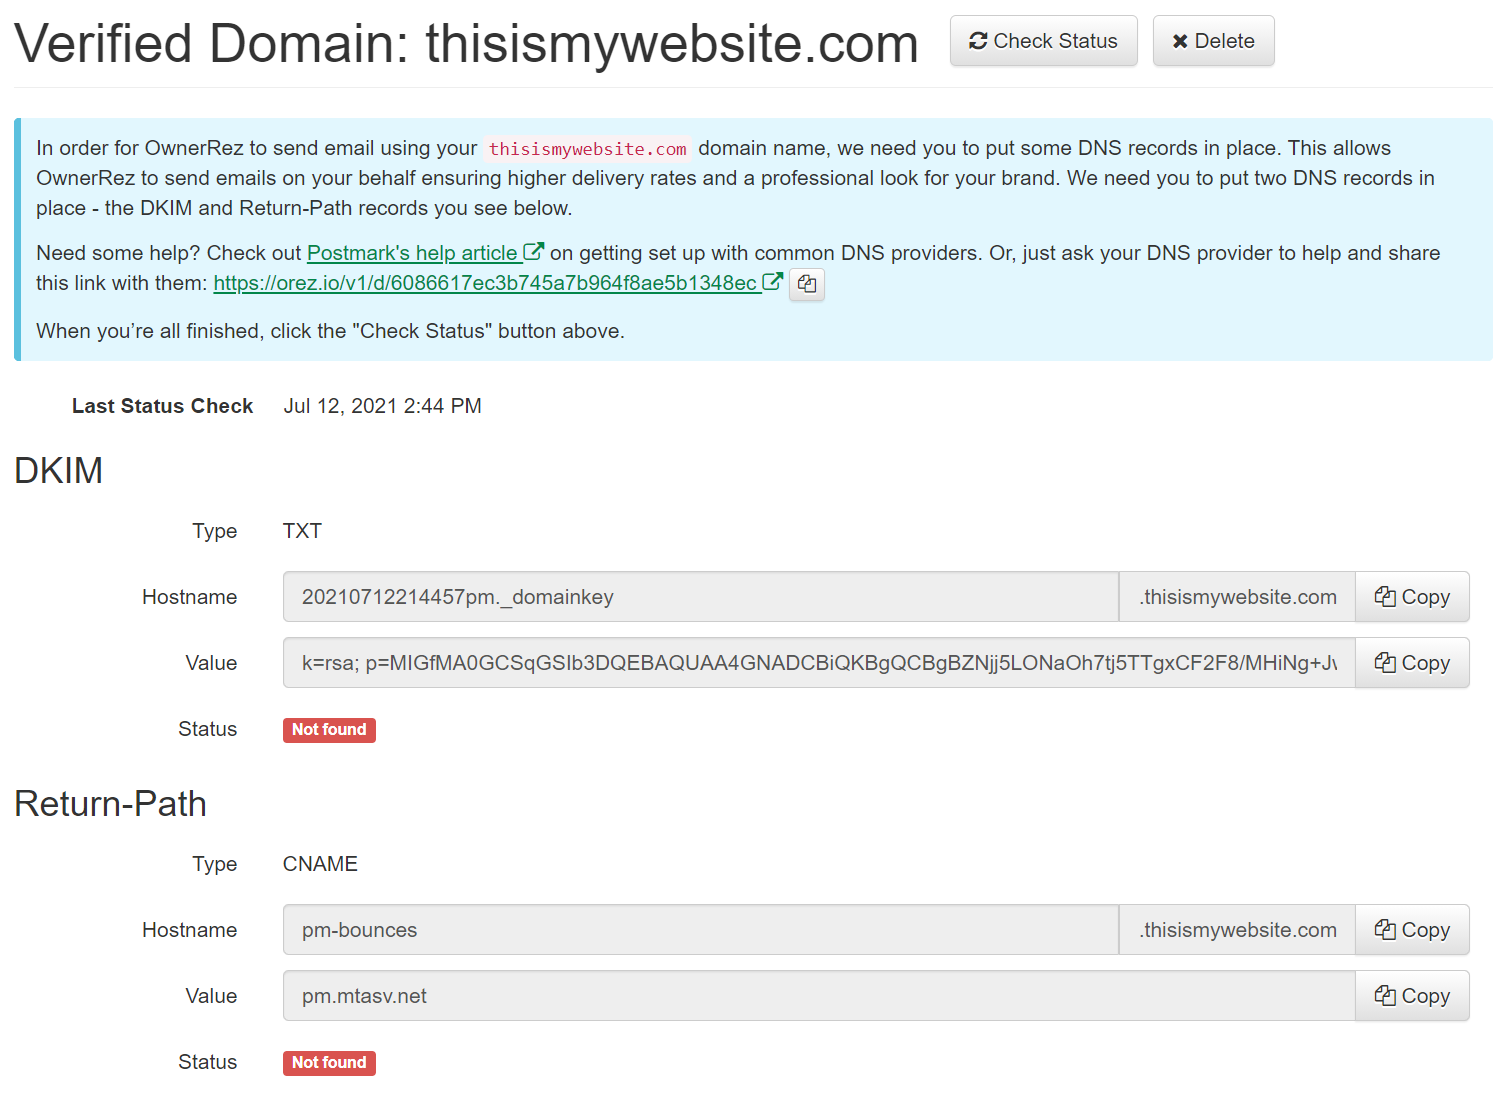
Configure DNS records in Namecheap
Follow the instructions in Namecheap's, How do I set up host records for a domain? support article.
Test:
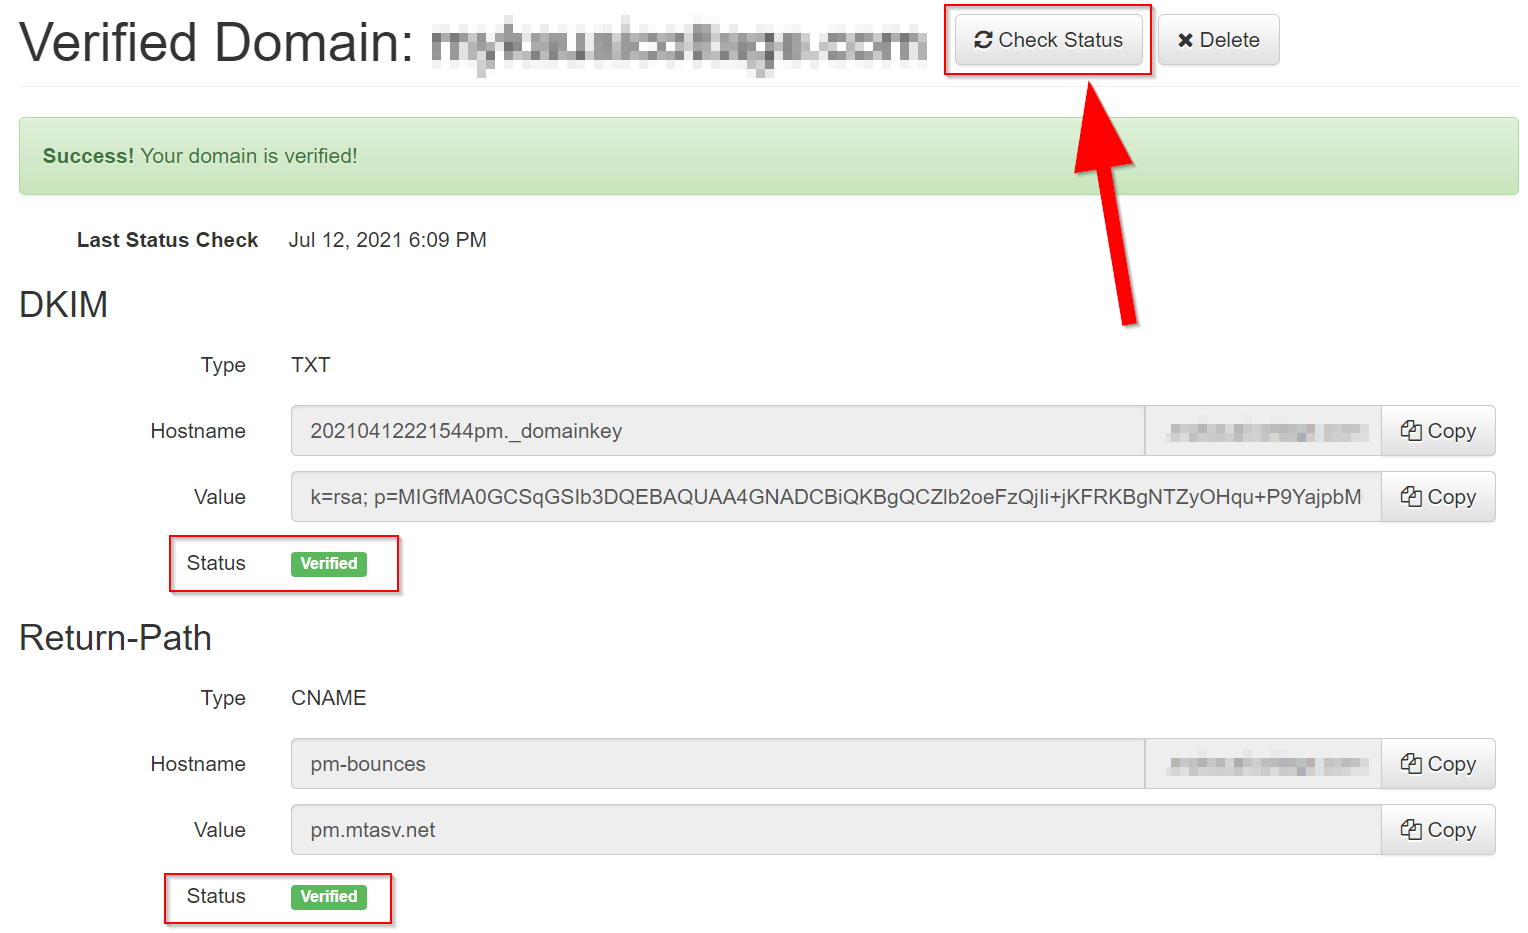
You can ensure that you have set your DNS settings correctly by going to Settings > Verified Email Domains, then select the domain you were setting up. Click the Check Status button at the top. If you setup your DNS setting correctly, you will get a success message and see the status for each record as verified.
Wait at least an hour after making changes before testing - it can take some time for DNS changes to propagate across the Internet.